
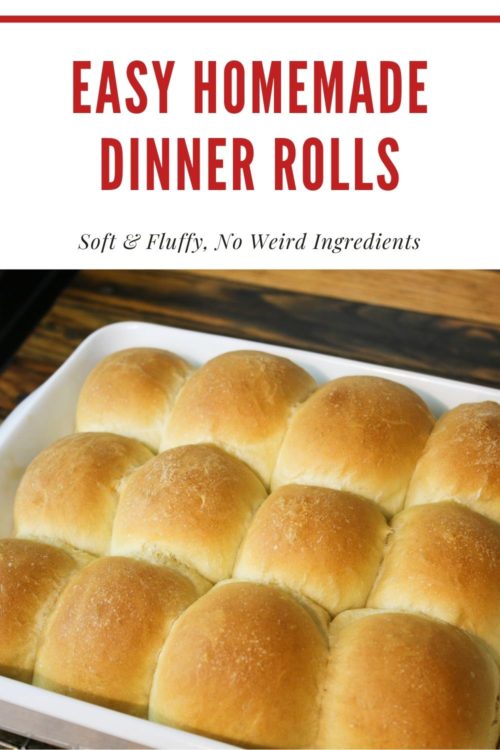
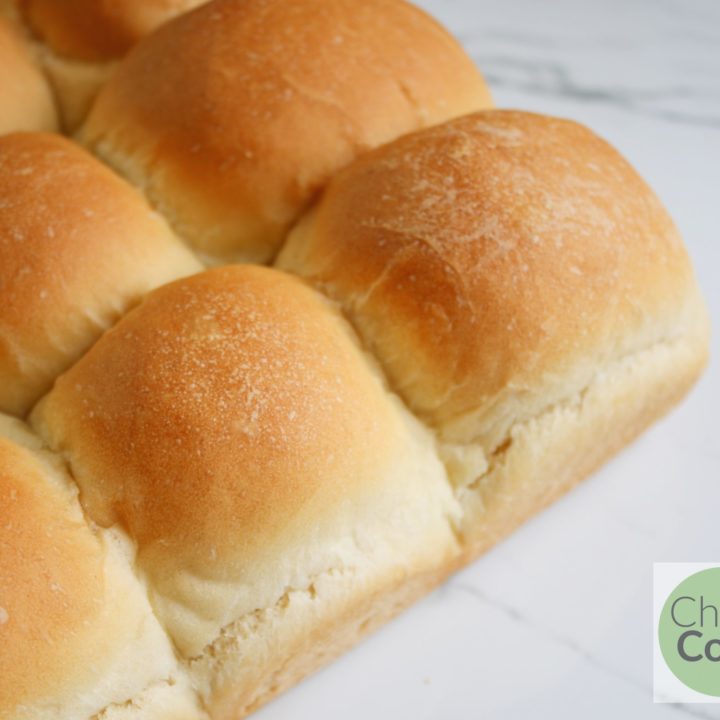
Use this easy recipe for the best simple homemade dinner rolls! I’ve been making this one for almost 20 years, and it’s our favorite.
This post contains affiliate links. That means if you click on my link and buy something, I will earn a small commission from the advertiser at no additional cost to you. Read my disclosure policy here.
Mama’s homemade dinner rolls.
Every Thanksgiving.
Every Christmas.
Every family get-together where we have a big meal together that could use some rolls, my mom makes these.
This dinner roll recipe is simple, delicious, budget-friendly, and flexible.
If you want to save money, I can’t tell you how handy a good dinner roll recipe is. Homemade bread is inexpensive to make and extra delicious. Who doesn’t love homemade bread?
You’ll be a family dinner rockstar, but your budget will thank you. Win win.
How to Make Homemade Dinner Rolls
Yeast bread can be intimidating, and I’ve talked to a lot of people who feel like they just can’t make homemade dinner rolls because yeast bread just doesn’t work for them.
Bread baking can be a beast to learn, but once you understand the basics, it just takes some practice.
This homemade dinner rolls recipe is based on my Master Bread Recipe. The idea here is that if you learn how to make this one yeast bread, you can make all kinds of things with it.
Simply mix up the basic dough, let it rise, and when it’s time to shape the loaves, make dinner rolls instead.
How to Shape Dinner Rolls
Dinner rolls are fairly simple to shape but funny to describe with words. When the dough is ready to shape, split it in half, then in half again, then in 4-5 parts each. Each dough blob should be about half the size of your fist.
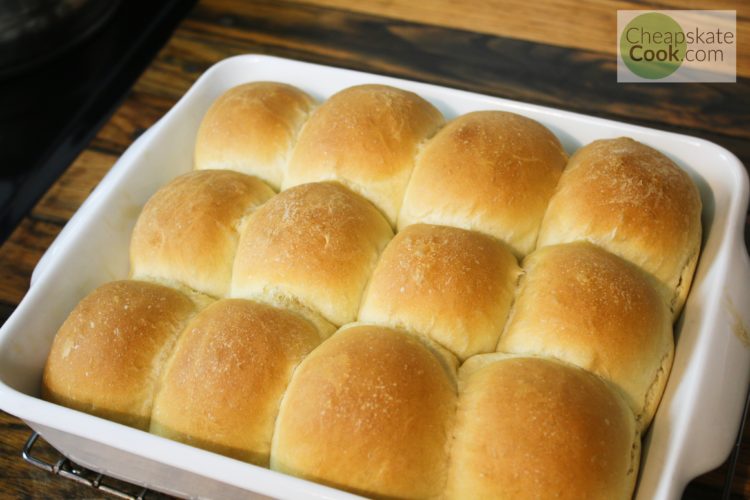
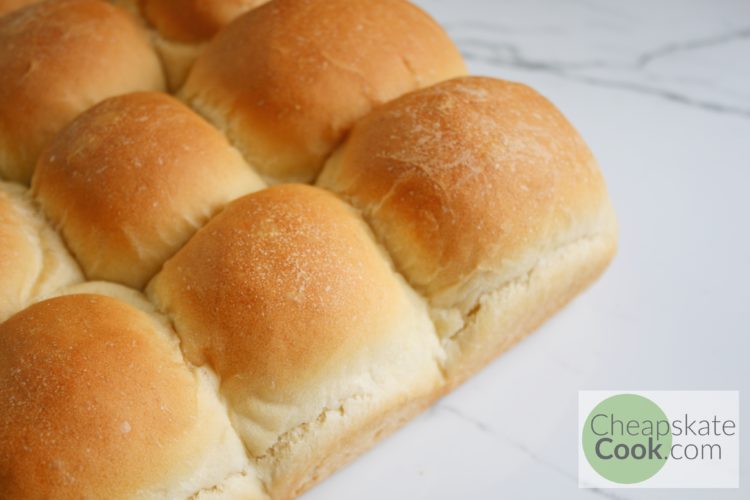
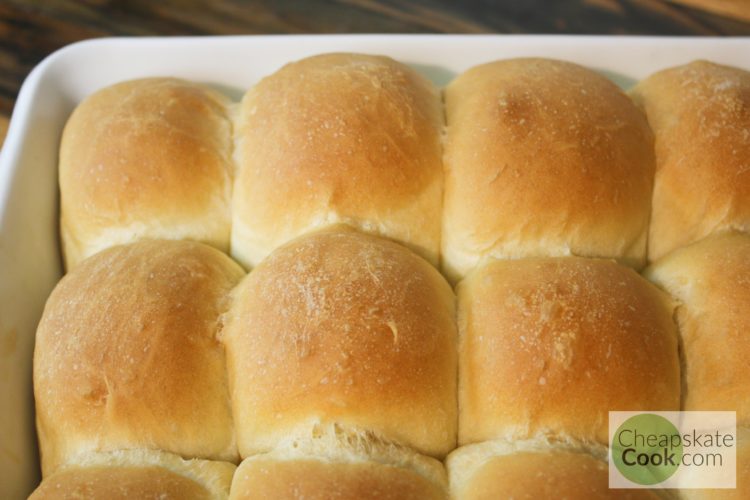
Then take a dough blob and use your fingers to tuck the edges into the middle. This will start to form a smooth mound on one end. Keep tucking until the round end holds its shape, then set it in a greased pan with the messy tucked-in side down. This method works better than just rolling the bread dough into balls, because the tucking motion creates tension in the dough, which leads to a better texture and prettier result.
If it sounds confusing, check out the video below!
Dinner Rolls Recipe 1-Minute Video
Homemade Dinner Rolls Ingredients
These dinner rolls use basic homemade ingredients: water, yeast, salt, flour, oil, molasses. But this recipe is extremely flexible and you can use all kinds of substitutions depending on what you have and what kind of results you want.
Flour
The basic recipe uses unbleached all-purpose flour. We love whole grains at our house, but unbleached flour is perfect for learning how to bake because it rises quickly and easily.
More often than not, I substitute up to half of the flour with whole wheat. This makes a delicious, hearty, everyday kind of bread. If I’m serving guests who aren’t used to whole wheat – or we’re just in the mood for soft and squishy rolls – I make them with unbleached flour.
Whole wheat dough takes longer to rise, so plan accordingly. Double the rise time you have planned.
White flour will rise more easily than whole wheat. If you’re just starting out baking, I recommend white flour for a quick win. Once you’ve mastered basic white bread (or rolls in this case), you can start adding more and more whole wheat flour.
Water
Water is the least expensive liquid, but in order to get that characteristic soft and fluffy dinner roll, you’ll want to use warm milk instead of water. Heat the milk in the microwave to about body temperature (100-110 F) before stirring in the yeast. If the milk gets too warm, let it cool back down before adding the yeast. Anything over about 110 F will kill the yeast, which will ruin the bread.
Molasses
Molasses is a very inexpensive natural sweetener that adds great flavor and color to homemade bread. This is my favorite sweetener for bread.
You can also use honey, maple syrup, brown sugar, or regular sugar.
Oil
We use olive oil, because that’s what we usually have on hand and it’s easy. But you can also use melted butter or any other neutral-tasting oil.
Yeast
My recipe calls for active dry yeast which is different from instant yeast (see below). Regardless, to ensure a good yeast bread, make sure your yeast is fresh and active. Store your yeast in the fridge or freezer so it lasts longer.
If you want to test it, stir a pinch of yeast in a bowl with warm (body temperature and no hotter) water and a pinch of sugar. If bubbles form from the yeast, it’s active and healthy.
Salt
Nothing special here. Just salt.
What is the Difference Between Active Dry Yeast and Instant Yeast?
Both active dry yeast and instant yeast do the same thing in a loaf of bread – they both act as a leaven, which reacts with the ingredients in the bread and gives it a light, airy texture as it rises and bakes.
However, there is one big difference between active dry yeast and instant yeast that you need to know:
Active dry yeast should be dissolved in water before adding it to the flour. Instant yeast can be stirred right into the flour.
To save money, I usually buy yeast in a big cake from Costco. I store a few cups of it in a jar in the fridge, and the rest of it I store in the freezer. It lasts for years this way. In fact, I can’t even remember the last time I bought yeast.
I’ll share the active dry yeast instructions in the recipe, but I’ll also add instant yeast instructions in the notes.
Regardless, to ensure a good yeast bread, make sure your yeast is fresh and active. If you want to test it, stir a pinch of yeast in a bowl with warm (body temperature and no hotter) water and a pinch of sugar. If bubbles form from the yeast, it’s active and healthy.
How to Make Soft & Fluffy Dinner Rolls
In order to get that characteristic soft and fluffy dinner roll, you’ll want to use warm milk instead of water. Heat the milk in the microwave to about body temperature (100-110 F) before stirring in the yeast. If the milk gets too warm, let it cool back down before adding the yeast. Anything over about 110 F will kill the yeast, which will ruin the bread.
Milk has a higher fat content than water, which produces a softer dough. When you bake it, the sugar in the milk caramelizes, producing a golden crust.
This is so delicious and rewarding to bake yourself.
However, full disclosure, my family loves this dinner rolls recipe just made with water, so I rarely make them with milk. It’s a great added step if you love soft and fluffy rolls, but it’s not necessary for good dinner rolls.
Tips for Making Homemade Dinner Rolls
- Use the right kind of yeast and make sure it’s not too old
- Use milk for soft and fluffy dinner rolls
- Let it proof in a warm place – I proof my bread dough in the oven with the light on but the oven OFF (put a peice of masking tape over the oven controls so you don’t accidentally turn it on)
- Shape them properly to get the best rise
- Make sure the rolls are all about the same size. It’s okay if they aren’t perfect, but you want to make sure they finish rising and baking at the same time.
- While baking, if the rolls are starting to get too dark, place a piece of foil over the top of them. Just keep it loose and kind of tented.
- Brush them with butter after baking (optional) for that delicious, golden sheen
To Make Homemade Dinners Rolls, You’ll Need:
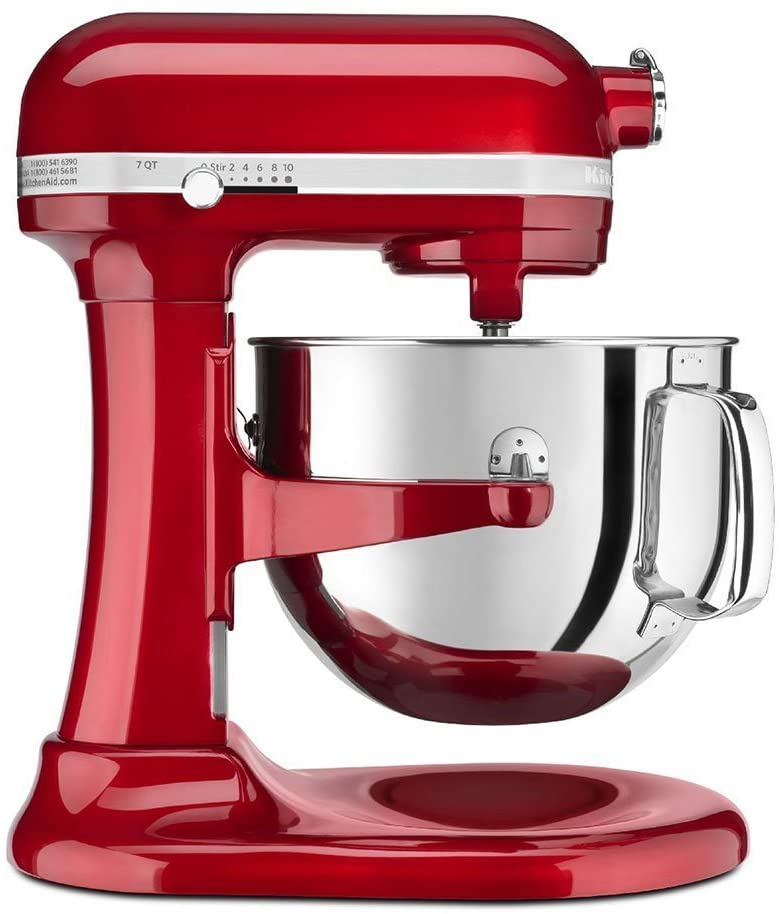
While using a Kitchen Aid or a Bosch Mixer to knead your bread dough is extremely helpful (I’ve had my giant-size Kitchen Aid for nearly 10 years, but I’m planning to get a Bosch if it ever dies), you can absolutely knead this bread by hand.
Kneading is something that is easier to understand when you see it, rather than read it, so I recommend hopping over to this video and seeing how to knead bread dough correctly!
I grew up in a family that baked bread all the time, and we always kneaded it by hand. My arms were so toned. Kneading bread is extremely soothing and therapeutic.
It’s therapy and carbs at the same time.
Don’t fear the hand-kneading.
That being said, I love having the option to NOT knead my bread now (thank you, KitchenAid), and my arm muscles certainly show it.
This Dinner Rolls Recipe is:
- Simple
- Quick (2 hrs and 10 minutes for yeast rolls is pretty great!)
- Dairy-free
- Vegan
- Delicious
- Whole grain options
- Fluffy
- Not too sweet
- Versatile!
Dinner Rolls
Use this easy recipe for the best simple homemade dinner rolls! I’ve been making this one for almost 20 years, and it’s our favorite.
Ingredients
- 2 1/2 cups warm water or milk (should be no hotter or colder than your finger when you dip it in the water)
- 1/4 cup olive oil
- 2 tbsp sugar, molasses, honey, or maple syrup
- 1 tbsp dry active yeast
- 6 cups unbleached all-purpose flour
- 2 tsp salt
Instructions
- In a large measuring cup or medium-size bowl - or, hey, even a plastic leftover container because you forgot to do the dishes and would rather make bread than clean the kitchen (true story) - stir together the water, oil, sugar, and yeast. Set it aside for 5-10 minutes, so the yeast can activate.
- Meanwhile, in a large mixing bowl, stir together the flour and salt. Nothing exciting happening here.
- However, there should be something very exciting happening in the yeast and water mixture. After 5-10 minutes, the surface of the water should look like a boggy, swamp possessed by a swamp demon. It'll be bubbly, frothy, and might have even started to rise a little. Fear not. You have the silver cross for this swamp demon.
- Pour the water mixture into the flour mixture and stir until a raggy, messy dough kind of comes together. It won't be pretty, but it should smell like bread.
- If you have a mixer with a kneading attachment (Kitchen Aid or Bosch are nice), use that to knead the dough for 5-10 minutes. During the kneading process, you might need to add a few tablespoons of water or flour if the dough is overly dry or wet. Only add a tablespoon of either ingredient at a time in order to avoid a cereal-and-milk,-then-more-cereal-to-use-up-the-milk,-then-more-milk-because-the-cereal-is-too-dry, situation.
- If you're like my family when I was growing up and love massive forearms, knead the dough by hand. This is easier seen than explained, so do a quick internet search and start making everyone jealous of your toned arms. Knead for about 10 minutes.
- I demonstrated in the video what the dough should look like when you're done kneading. Basically, if you gently press your finger against it, the dough should spring back until your fingerprint is mostly gone.
- Smooth the surface of the bread by tucking the edges underneath it until the surface is smooth and the dough forms a nice ball. Place it back in the bowl (you can grease the bowl with a little olive oil if you like), cover it with a towel, and let it rise in a warm place (see notes) for 30-40 minutes.
- It won't rise very high the first time. Punch it down, cover the bowl, and let it rise another 30-40 minutes.
- Shape the rolls. Dinner rolls are fairly simple to shape but funny to describe with words. When the dough is finished rising, split it in half, then in half again, then in 4-5 parts each. Each dough blob should be about half the size of your fist.
- Then take a dough blob and use your fingers to tuck the edges into the middle. This will start to form a smooth mound on one end. Keep tucking until the round end holds its shape, then set it in a greased pan with the messy tucked-in side down. This method works better than just rolling the bread dough into balls, because the tucking motion creates tension in the dough, which leads to a better texture and prettier result.
- Cover and rise for 15 minutes. When the timer goes off, preheat the oven to 350 F and let the rolls rise for another 15-20 minutes, until nearly doubled in size.
- Bake for 20-30 minutes, until the tops of the rolls are golden brown.
- Take a stick of cold butter, peel back the wrapper, and use it like a marker to spread butter on the tops of the rolls. This step is totally optional but delicious.
- Cool for 10 minutes before serving.
Notes
WHOLE WHEAT
If you want 100% whole wheat rolls that don't crumble, check out our non-crumbly whole wheat bread recipe here. Just follow the recipe and shape it into rolls instead of a loaf.
If you just want to add some whole wheat to your rolls, go for it! You'll have to knead the bread a little longer and let it rise a little longer because the gluten strands in wheat flour are a lot sleepier.
In my experience, anything more than half whole wheat flour and half white flour will be significantly more crumbly and thick than white flour bread.
INSTANT YEAST
If you're using instant yeast, simply stir the yeast in with the flour and salt, then pour the liquids into the flour mixture.
NO-KNEAD VERSION
IF YOUR DOUGH DOES NOT RISE
Possible culprits:
1. Old yeast - especially if it's been stored in the cupboard for a long time. Store yeast in the fridge or freezer for longer life.
2. Too cold - Here's a bread rise hack. Turn your oven light ON but keep your oven OFF. This creates a warm, but not hot place for the bread to rise. Stick a piece of tape over the oven controls so you don't accidentally melt your bowl into your oven rack (ask me how I know).
Recommended Products
As an Amazon Associate and member of other affiliate programs, I earn from qualifying purchases.
Nutrition Information
Yield 16 Serving Size 1Amount Per Serving Calories 285Total Fat 4gSaturated Fat 1gTrans Fat 0gUnsaturated Fat 3gCholesterol 1mgSodium 309mgCarbohydrates 56gFiber 1gSugar 20gProtein 6g
Please note: The actual calories and nutrition of this dish will change depending on what ingredients you use. Additionally, the nutrition information in this card is generated automatically and is not always accurate.