
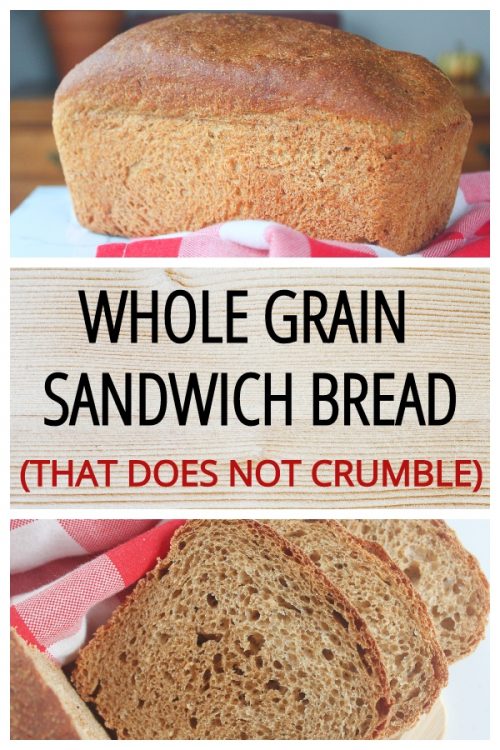
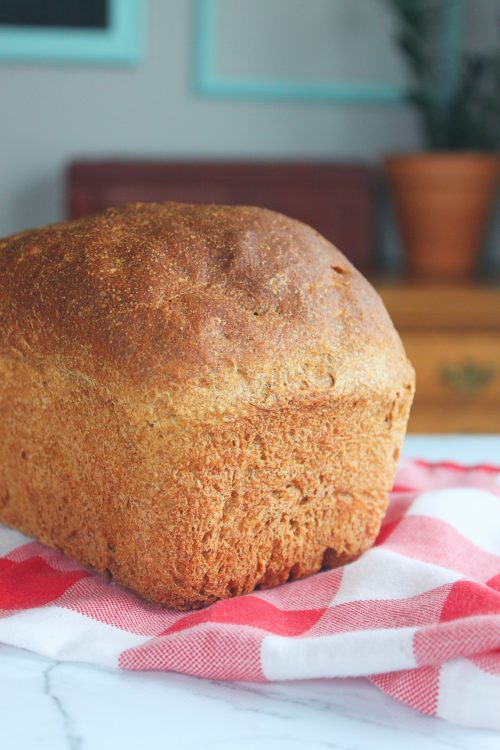
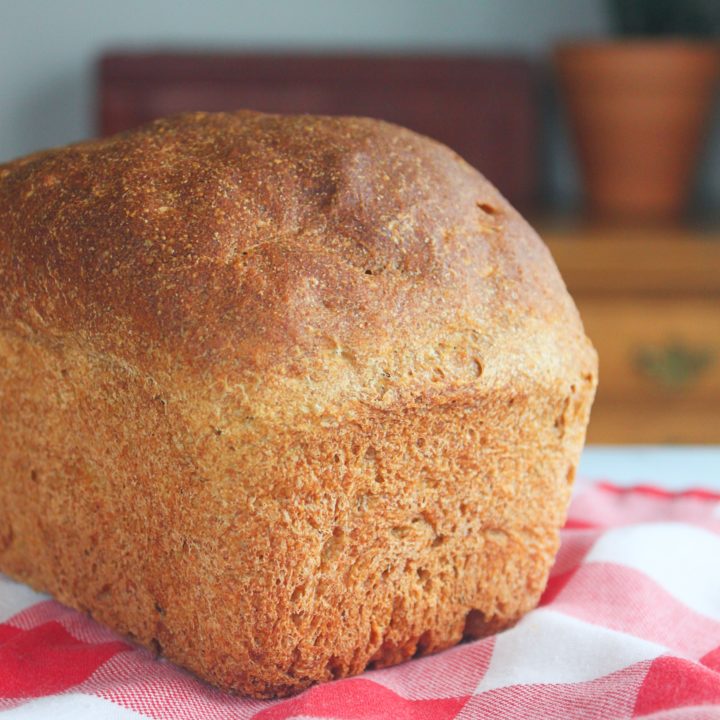
Inexpensive, homemade whole grain bread that doesn’t crumble when you make sandwiches and is more friendly for gluten-sensitive stomachs.
This post contains affiliate links, which means we receive a small compensation if you make a purchase using the links. You can view our full disclosure policy here.
A while back, I shared our classic go-to bread recipe. It’s the one my mom first started making regularly when we gave up store-bought bread and tapped into our hippy roots when I was a teenager.
Years later, I started making a new bread – this bread – when I learned more about grains, digestion, and wanted to find a whole grain bread recipe that could make a sandwich that didn’t crumble. (If you have ever tried to do this, you know how important it was.)
This recipe requires one extra step, but that step makes all the difference.
Whole Grain Sandwich Bread
So why make whole grain sandwich bread?
I’ll be honest: Sometimes I make our own sandwich bread. But I don’t always.
This is because our time is precious.
While good food is important to me, we need to find a healthy balance between healthy food, our budget, and our time. So while I try to bake bread regularly, we occasionally eat store-bought bread.
I either try to find a quality sprouted or organic bread for around $3-4/loaf, or we get Kroger markdowns – because if I am going to buy bread that is bad for us, I am certainly not going to pay full price!
Currently, my favorite bread to keep on hand (that I make all the time) is our Easiest Sourdough Bread Ever. All you have to do is mix, rise, pour, and bake it. Done.
Make This Whole Grain Sandwich Bread:
Here is what you might want to make this sandwich bread.
This Bread is Less Crumbly!
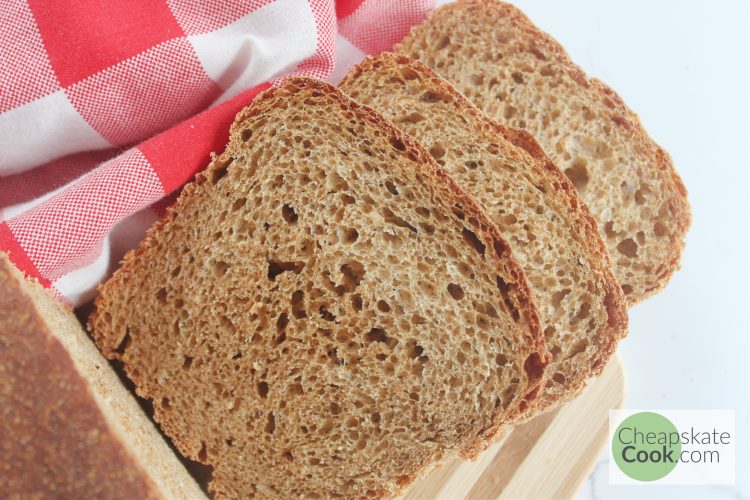
The overnight soak makes the whole grain texture of this bread far less crumbly than many other homemade whole wheat bread recipes. This is my favorite whole grain sandwich bread. It’s no Wonder Bread, but white bread from the store isn’t our goal anyway.
Soaked Whole Grain Bread can be Easier to Digest!
People in our family who are sensitive (but not allergic) to gluten handle this bread just fine. The reason dives into the nerdy details about breaking down parts of the wheat that are harder on our stomachs. Suffice to say that our lower-gluten family loves this bread.
This Whole Grain Sandwich Bread is:
- Healthy
- Whole food
- Low gluten
- Kid-approved
- Whole grain
- Great for gluten-intolerance
- Dairy-free
- Egg-free
- Make-ahead
- Whole wheat
- Non-crumbly
- Perfect for sandwich bread
- Freezer-friendly
If you want to see this recipe demonstrated, here’s a video! Watching someone else make a new recipe helps give me a better idea of how each stage should look. Plus, I added some bonus tips. Enjoy!
Note: These are the glass mixing bowls with lids that I mentioned. They are by far my favorite mixing bowls because the lids help me avoid buying and using plastic wrap (bad for my budget and the environment!). Works perfectly for bread, sourdough, salad, and storing large amounts of leftovers.
Sourdough Variation
I have also made this bread using a 1/2 cup of sourdough starter in place of the apple cider vinegar. In fact, those are the photos I took for this post! The crumb turns out a little bigger (and more crumbly) but it’s still delicious.
A Word on Kneading
(The following links are affiliate links.)
Unlike the Easiest Bread Ever, this bread requires kneading. While I sometimes knead bread by hand (a good arm work out!), as soon as I was able, I got a Professional Kitchen Aid Mixer. This has been a huge time saver.
I will never claim that you need a machine to bake good homemade bread. I never had one growing up, and we baked our bread for at least 8 years. However, I personally would not make as much bread if I didn’t have some way to knead it by machine.
Some people swear by Bosch Mixers, and some love bread machines (I hear this one is amazing). In my opinion,
IMPORTANT: Whatever machine you use, make sure you check with the manufacturer in case there are special instructions for whole grain recipes. I burnt out my first Kitchen Aid because apparently whole wheat is a lot harder on the gears when it comes to kneading. Thankfully, they replaced it free of charge and let me know how to prevent it in the future. I have had this one for about 8 years, and it has kneaded hundreds of loaves of bread.

Other Helpful Equipment
Besides the basics – measuring cups, a good spoon, etc. – the only other really handy tool I would suggest is a bowl with a lid. I use these Pyrex Mixing Bowls with lids. I use them for baking, serving, and storing leftovers
I actually made homemade bread for years before I even owned loaf pans. If you don’t have a loaf pan, simply grease a baking sheet, shape the dough into a smooth ball and place it on the sheet (only half of it needs to be smooth – put the ugly half on the sheet). Bake as directed. You will
If you try this recipe, let us know! Leave a comment, rate it, and tag a photo #cheapskatecook and @cheapskatecook on Instagram.
Non-Crumbly Whole Grain Sandwich Bread
Inexpensive, homemade whole grain bread that doesn't crumble when you make sandwiches and is more friendly for gluten-sensitive stomachs.
Ingredients
- Step 1:
- 6 cups whole wheat flour
- 2 cups warm (not hot) water
- 2 tbsp apple cider vinegar
- Step 2:
- 1/4 cup warm (not hot) water
- 3 tsp yeast
- 1/2 tsp baking soda
- 1/3 cup olive oil
- 1/3 cup plus 1 tsp molasses, , separate
- 2 tsp salt
- 2 cups unbleached all-purpose flour
- Butter, for greasing
Instructions
Step 1:
- The night before you want to bake bread, stir together the flour, water, and apple cider vinegar in a large bowl. Dough will be very stiff. Don't worry! It will come together. If you absolutely need to add more water, add 2 tbsp at a time until it comes together into a smooth ball.
- Cover with plastic wrap or a tight-fitting lid and let it sit on the counter for 12-24 hours.
Step 2:
- The next day, combine the water, yeast, baking soda, and 1 tsp molasses in a small bowl. Let it rest until bubbly, about 5-10 minutes.
- In a large liquid measuring cup, stir together the olive oil, salt, and the remaining molasses.
- Uncover the bowl of flour and water. It will probably have oxidized and turned an unappealing grayish color, but that's normal. It will be beautiful in the end. Pour half of both the yeast mixture and the olive oil mixture into the bowl.
- Use a sturdy wooden spoon to begin stirring. Add 1 cup of flour and knead it into the dough. It will be a gloppy mess that you will think can never become bread dough. Don't worry! Eight years of baking this bread tell me it will work. Keep kneading and stirring, using your hands if needed.
- Add the rest of the liquids and the remaining cup of flour. When the dough is no longer sticky, use your hands to knead it until it is smooth and elastic. This means that when you poke the dough with your finger, the dough bounces back in place leaving only a slight indentation from your finger. Add more flour a few tablespoons at a time if necessary. Altogether, the kneading should take about 10 minutes.
- Place the dough in a large bowl, cover it with a towel, set it in a warm place (between 80 and 90 F - see notes), and let it rise for 1 hour.
- Uncover the bowl, punch the dough down (2-3 good punches with a closed fist - just to deflate it a little), recover it, and let it rise again for 1 hour.
- Repeat: punch down the dough and let it rise 1 hour.
- Grease 2 loaf pans with butter or oil. Split the dough in half with your hands and gently shape it into an oblong blob. Place it in a loaf pan, tucking in the ends to make a smooth loaf. Repeat with the remaining half.
- Cover the loaves and let them rise on the counter for 30 minutes.
- Preheat the oven to 350 F. Let the bread loaves continue to rise for another 30 minutes.
- Remove the towel, place the loaves in the oven, and bake them for 30-35 minutes, until the loaf sounds hollow when you lightly rap it with your knuckles (quickly and carefully so you don't burn yourself).
- When it is done, let the bread cool on a cooling rack for 10 minutes before turning over the pans and removing the loaves from the loaf pans.
Notes
Flour:
I have made this bread with a variety of flours, including spelt instead of whole wheat. I have also used all whole wheat before and freshly ground whole wheat.
Apple Cider Vinegar:
Any kind of acid should work. I have used lemon juice, white vinegar, and whey (from yogurt or kefir). Read more about soaking grains here.
Molasses:
You can substitute the molasses with any liquid sweetener - honey, maple syrup, etc. Molasses is the least expensive, and I prefer the flavor and color it gives the bread.
Sourdough Variation:
I have also made this bread using a 1/2 cup of sourdough starter in place of the apple cider vinegar. In fact, those are the photos I took for this post! The crumb turns out a little bigger (and more crumbly) but it's still delicious.
A Warm Place to Rise:
In the colder months, I let my bread dough rise in the oven with the oven light turned on. You can also turn the oven on for 30 seconds, then turn it off, check to ensure it isn't too hot (you want it between 80 and 90 F) and place the dough in there with the oven light on. This creates a warm place for the bread to rise better.
TIP: Always put a piece of masking tape on the oven controls when the bread is rising in there, so you don't forget and turn the oven on!
In the hotter seasons, I simply let my bread rise on the table on the patio and let nature do the work.
Recommended Products
Some of these links are affiliate links. Read my disclosure policy here.


Nutrition Information
Yield 10 Serving Size 2 slicesAmount Per Serving Calories 416Total Fat 10gSaturated Fat 2gTrans Fat 0gUnsaturated Fat 8gCholesterol 3mgSodium 540mgCarbohydrates 72gFiber 9gSugar 1gProtein 13g
Please note: The actual calories and nutrition of this dish will change depending on what ingredients you use. Nutrition information is not always accurate.
More Bread Recipes You Might Love:
- The Easiest Bread You Will Ever Make
- Easiest Sourdough Bread Ever
- Quick Yeast-Free Bread (Irish Soda Bread)
- Simple Sourdough Sandwich Bread
- Whole Grain 1-Bowl Banana Bread
- Whole Grain 1-Bowl Pumpkin Bread
What You Can Do Now:
Have you ever tried soaking your flour overnight before baking?
If you found this post helpful, let us know! Leave a comment, share it on Facebook or Pinterest, and follow us on Instagram or YouTube for more!
Slash your grocery budget and feed your family real food! Get simple, frugal, real food menu plans every month for FREE in the Cheapskate Cooks’ 1-Min Email. Get your first one here.
Do you let it rise it 3 times before shaping and the final rise? I just want to make sure! Thanks for all your extra notes at the end. I’m excited to try this tonight!
Yes, Leesi! With every rise, the dough rises higher, so 3 times does the trick! (Buuuuuut sometimes if I am short on time, I will do 2 extra-long rises.)
Hi, I made this bread yesterday with the molassses, non bleach flour and whole wheat flour on a baking pan (not a bread pan). I put it in the middle shelf of the oven and cooked for 30 mins at 350. The top looked like it was starting to brown too much and I thought it was possibly done so i didnt cook it longer. However, I feel like the bread is not quite cooked enough and a little doughy in the middle, is there something I should do differently next time? Thanks.
Hi Diana! There a couple of reasons this could happen:
1. Bread made with molasses and ww are darker brown, so they might look like they are done, but they aren’t actually. They just need to be a bit darker than white flour bread!
2. If you think it is baking too fast of the top, pop it down to a lower rack in the oven – just keep an eye on the bottom of the bread (use a spatula to lift it up and check) so that part doesn’t burn!
3. Do you have an oven thermometer? Most electric ovens do not heat accurately. For example, my oven thermometer consistently reads 25 degrees lower than the temperature I set it at, so I have to adjust the temperatures when I bake.
Hope this helps, and let me know how the next loaf goes!
I’m wondering if you can add seeds to the dough?
Hi Janice! I add all kind of things to the dough – flax, chia, oats, etc. Keep in mind that each extra ingredient affect the final texture.
I made this bread yesterday and it turned out beautifully! The texture, the color, the crumb, the mouth feel are all awesome! The flavor is great too, except I somehow ended up with a pretty bitter after taste, and I can’t figure out why. I followed the recipe to a tee, with the only substitution being bread flour instead of all-purpose flour, because that’s what I had. I have also made other bread with both of these batches of flour before, and they weren’t bitter, so I don’t think it’s the flour itself.
Do you have any ideas on why this happened? Is there something in this process that could have caused this?
Hi Murielle, that’s interesting! My only guess is that the bread flour had something to do with it. However, I’m not sure why that would happen. Have you tried the recipe again with either bread flour or all-purpose?
Would you be able to share how you incorporate your kitchen aid into this process? When would you dump the dough in and mix it. And for how long? I have a kitchen aid Professional 5 Plus. I’m assuming it can handle mixing dough on the lowest setting, I have a dough hook attachment. Any insight you can share would be appreciated!
Great question, Sarah! I use the Kitchen Aid for the kneading step. Because my Kitchen Aid can only knead one loaf’s worth of whole grain bread at a time (yours might be the same – I have a pro as well), I dumb half of the flour/water/ACV mixture into the bowl, half of the wet ingredients (I just estimate) and half of the flour. My Kitchen Aid manual says that for kneading bread, you use setting 2. After it is done kneading, remove the springy, awesome dough and repeat with the second half of the ingredients. Quite often, I’ll knead half in the Kitchen Aid and do the other half by hand – the kids usually want to help, so it doesn’t take too much of my time. Hope that helps!
any suggestions for adapting this recipe to a bread machine
Hi Lois! I think this post will be helpful: https://www.kingarthurflour.com/blog/2018/04/30/how-to-convert-recipes-to-a-bread-machine
Let me know how it goes!
Can you give me the recipe for one loaf. Can I add more white flour so it isn’t so dense?
Thanks, Char
Hi Charmaine! If you just half the recipe, it will make 1 loaf. And you can absolutely use more white flour in order to make it less dense!
After Step 1, my flour, apple cider vinegar, and water was dry and crumbly…Is this right? It didn’t seem right to me. Just need some reassurance this is normal!
Hmmm… it doesn’t usually get crumbly. But if that happened to me, I wouldn’t worry about it! Just continue as normal and add more water as necessary.
I’m confused about the flour amounts. Is the added flour in the instructions part of the 6 cups in the ingredients list? Also, how much flour do you use for the Levin (the part you ferment overnight?) I’d love to try your recipe but i need a llittle clarification. Alsl, when using sourxough starter, typically you subtract equal amounts of flour & water from your recipe to compensate for the added starter. Is this what you did ?
Hi Kathy! For Step 1 (the Levin) you only use the 6 cups of flour called for in the recipe. For Step 2, you add up to 2 cups flour to the dough. So the two amounts are separate. I hope that helps! Let me know if I can help with anything else!
Allison sounds like a good one I’ll try it next week
How long does this bread last on the counter? Maybe someone already asked this question, but I couldn’t find it.
Hi Marcela! Usually, I only let my homemade bread sit on the counter for 3 days.