
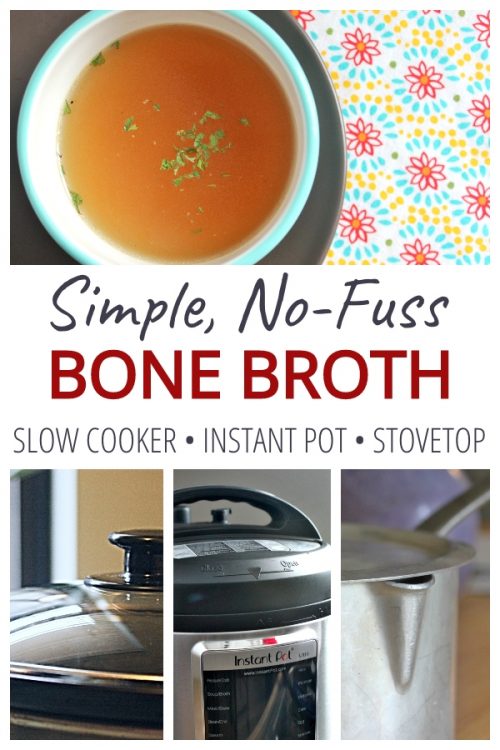
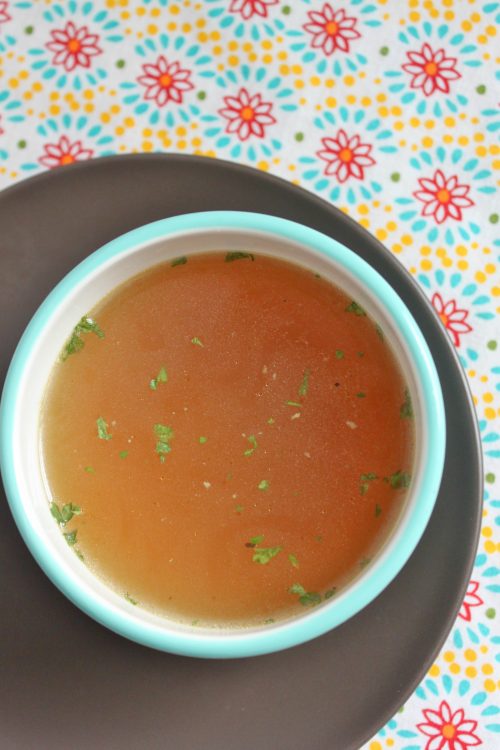
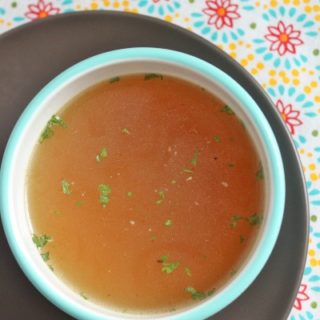
A simple, no-fuss process to make nourishing, practically free bone broth in 3 ways: on the stovetop, in the slow cooker, or in your Instant Pot.
This post may contain affiliate links. Read my disclosure policy here.
I never intended to share a Bone Broth recipe. It’s kind of a trendy food right now, and everyone has their own version.
However, since we make it often, and I frequently share the process on Instagram Stories, I get a lot of requests to share our recipe.
I have made bone broth regularly the last 10 years. Even when we only spent $35/week, it fit into our budget.
3 Reasons You Will Like This Recipe:
- You only want to invest 5-minutes of active work to get bone broth.
- You’re on a tight budget and need something that’s practically free.
- You aren’t interested in extra steps – just a simple process you can work into your kitchen routine.
Because if I’m going to make something all the time, it has to be simple.
A friend recently mentioned that I should not have named this space Cheapskate Cook. I should have named it something along the lines “Lazy Healthy Cook.”
She’s not wrong. That describes my philosophy very well. I love flavors and good cooking, but for everyday meals I need simple, frugal, real food.
3 Reasons You Won’t Like This Recipe:
- You like extra steps to ensure perfect flavor every time.
- You don’t want something cheap – you want the best
- You have time on your hands that you want to invest in discovering the perfect bone broth.
There is nothing wrong with wanting the best. Over the years, I tried a lot of recipes for bone broth, but I always settled back to this simple, no-nonsense process. It’s the same basic method whether you use the stovetop, a slow cooker, or the instant pot.
For Lazy Healthy Cook reasons, right now I like the Instant Pot best. However, I used the slow cooker most of the last 10 years. Try it a couple ways and find what works for you. Then you too can become a Lazy Healthy Cook.
What Makes Bone Broth Extra Cheap
The key to exceptionally frugal bone broth is the Broth Bag.
This is a bag that we keep in the freezer. Every time we peel an onion or carrot, or chop celery, the ends and bits go into the bag.
Other odds and ends find themselves in the bag as well: broccoli stalks, cabbage hearts, asparagus ends, etc. This ensures we get any nutrients (and our dollar’s worth) out of them without actually eating them.
If you don’t have a broth bag, use the veggies suggested in the recipe. Sometimes, if my bag is heavy on carrot peels and low on onion, I add an onion to the broth.
Since we only use the broth in our soups and rarely drink it straight, the broth doesn’t need to have a perfect flavor. When I need that, there are plenty of other recipes for me to follow.
But for our regular needs, this process is what keeps me sane, my soups rich, and my budget on point.
5 Tools That Make This Easy
Obviously, a large stock pot, Instant Pot, or slow cooker is the most important tool. You don’t need anything else besides a colander and medium-size stockpot or heat-proof bowl to make this broth.
However, over the years, I found a few tools (that I use all the time in the kitchen anyway – I can’t stand single-use kitchen gadgets), and they make the bone broth making much simpler and smoother.
1. Mesh Strainer
This works better than a colander in my opinion. Ensures a nice clear broth instead of one with mysterious floaters. Check it out here.
2. Half-Gallon Jar
This recipe makes just over a half gallon of broth. Full gallon glass jars are really heavy and cumbersome, so I store the broth in a half-gallon jar like this and a pint jar.
3. Mason Jar Funnel
If you regularly use canning jars, a funnel is a game changer. It’s one of my favorite kitchen purchases from the last 10 years, and I use it almost daily.
I have a silicone funnel, but if I could do it over again, I would get stainless steel like this one.
The Bone Broth Recipe is:
- Easy
- Healthy
- Versatile
- Gluten-free
- Dairy-free
- Egg-free
- Paleo
- Keto
- Whole30
- Allergy-friendly
- Make ahead
- Freezer-friendly
If you try this recipe, let us know! Leave a comment, rate it, and tag a photo #cheapskatecook and @cheapskatecook on Instagram.
5-Minute Bone Broth: 3 Ways
A simple, no-fuss process to make nourishing, practically free bone broth in 3 ways: on the stovetop, in the slow cooker, or in your Instant Pot.
Ingredients
- 1/2 of a cooked chicken carcass (bones, skin, giblets, etc.)*
- 1 yellow onion
- 2 large carrots
- 1 celery rib
- 3 cloves garlic
- 1 bay leaf
- 3 qrt water, (depends on the size of your pot)
- 1 tbsp apple cider vinegar
Instructions
Stovetop:
- Place all ingredients except water and apple cider vinegar in a 2-gallon stock pot. Fill it with water until it is 3/4 of the way full.
- Bring to a boil over medium-high heat. Use a slotted spoon to remove any scum that rises to the top. Discard the scum.
- Cover and decrease the heat to low. Add 1 tablespoon apple cider vinegar. Simmer for 2-12 hours, until the bones crumble in your hands because all the nutrients got sucked out of them.
- Turn off the stove, remove stock pot from heat, and allow broth to cool slightly. Strain the broth by placing a colander or mesh strainer across the top of a heat-proof bowl or another large stock pot (big enough to hold the broth). Pour broth into the colander. The colander will catch all the chicken and vegetables, leaving only a clear broth in the bowl.
Slow Cooker:
- Place all ingredients in a slow cooker except water. Fill slow cooker with water until it is 3/4 of the way full.
- Cover and cook on low for 6-24 hours, until the bones crumble in your hands because all the nutrients got sucked out of them.
- Turn off your slow cooker and allow broth to cool slightly. Strain the broth by placing a colander or mesh strainer across the top of a heat-proof bowl or another large stock pot (big enough to hold the broth). Pour broth into the colander. The colander will catch all the chicken and vegetables, leaving only a clear broth in the bowl.
Instant Pot:
- Place all ingredients except water and apple cider vinegar in an Instant Pot. Fill it with water until it is 3/4 of the way full.
- Cover, seal, and cook on manual for 35 minutes. After a natural release, the bones should crumble in your hands because all the nutrients got sucked out of them.
- Turn off your Instant Pot and allow broth to cool slightly. Strain the broth by placing a colander or mesh strainer across the top of a heat-proof bowl or another large stock pot (big enough to hold the broth). Pour broth into the colander. The colander will catch all the chicken and vegetables, leaving only a clear broth in the bowl.
To Store:
- Store broth in a covered container or jars in the fridge for up to 5 days.
To Freeze:
- Pour broth into a freezer bag, plastic container, or glass jar. Leave about 1-2 inches at the top to allow the liquid to expand while it freezes. Seal tightly. Store in the freezer for up to 6 months.
Notes
Broth Bag:
This is a bag that we keep in the freezer. Every time we peel an onion or carrot, or chop celery, the ends and bits go into the bag.
Other odds and ends find themselves in the bag as well: broccoli stalks, cabbage hearts, asparagus ends, etc. This ensures we get any nutrients (and our dollar's worth) out of them without actually eating them.
If you don't have a broth bag, you can just use the veggies suggested in the recipe. Sometimes, if my bag is heavy on carrot peels and low on onion, I add an onion to the broth.
*Store the rest of the chicken carcass in your broth bag and use it later.
Recommended Products
Some of these links are affiliate links. Read my disclosure policy here.

Nutrition Information
Yield 12 Serving Size 1 cupAmount Per Serving Calories 16Total Fat 0gSaturated Fat 0gTrans Fat 0gUnsaturated Fat 0gCholesterol 3mgSodium 13mgCarbohydrates 2gFiber 0gSugar 1gProtein 1g
Please note: The actual calories and nutrition of this dish will change depending on what ingredients you use. Nutrition information is not always accurate.
What to Make With Bone Broth
I use bone broth in anything that calls for chicken or vegetable broth. Sometimes I drink it straight with a little salt for gut-healing (but only if I used a really good, organic chicken). Here are some recipes that use bone broth:
- White Bean Chili
- 10-Minute Homemade Tomato Soup
- Cumin Beans
- Potato Peel Soup
- Githeri (Kenyan Corn, Beans & Greens)
- Simple Mediterranean Yellow Rice
What You Can Do Now:
Have you started a Broth Bag of your own?
If you found this post helpful, let us know! Leave a comment, share it on Facebook or Pinterest, and follow us on Instagram or YouTube for more!
Slash your grocery budget and feed your family real food! Get simple, frugal, real food menu plans every month for FREE in the Cheapskate Cooks’ 1-Min Email. Get your first one here.
Thanks for the super easy recipe for something that can cost quite a bit in the store. I like homemade better anyway! I have been cooking from scratch since I was about 14, 44 years later, I still am! Much healthier for you than packaged goods and the taste is so much better too!
So glad this helped! Sounds like you got a great start. I started cooking a lot at home as a teenager too. It helps so much.
Hi Steph, thanks for sharing such a simple broth recipe.
You’re welcome, Akash!
Can this bone broth be used in recipes that call for chicken/beef broth?
Yes! I never buy chicken broth – I just use this in its place.
Have you tried this with just veggies? I want to make some soup that calls for veggie broth and wasn’t sure how much it would need to be adjusted. Thanks!
Yes, Sherri! I make this all the time with just veggies!
If you get a nice layer of fat at the top, once cooled, you can keep the broth in back of fridge for easily a month or more. The fat seals it. It smells delicious and is delicious still!
I don’t put any veggies in mine, just dry kombu fronds and bay leaves. I use a lot more (hot pepper) vinegar and salt & pepper when I use the finished broth later. The broth bag is a good idea but my broth tastes fantastic to drink, just need enough salt. Broth needs TONS of salt. I put dulse flakes and more vinegar in it also when I drink it. Miso is nice in it too.
I’ve never tried kombu fronds! Where do you get them? How are they on the budget?
If you use a whole chicken, do you think you could more water after the broth cooks?
Absolutely! I frequently dilute my broth to help it stretch to more meals.
Thanks! Quick question- for instant pot bone broth recipe- when do you add the vinegar?
Hi Vicki, I usually put it in before cooking. However, since the IP cooks hot and fast (unlike the typical low and slow method for traditional broth), I’m not sure if the vinegar is actually effective in there or not.